

how to fix joy con drift
A few words of thanks would be greatly appreciated.
How to fix Joy Con drift
Latest update on by Elena Keracheva .
Experiencing a Joy Con drift while you are enjoying your favorite game on Nintendo Switch can be overly frustrating. The Internet is full of potential solutions, however, it seems that they only work for a limited period of time before the problem comes back as annoying as usual. Although Nintendo now offers free repair service, it still looks like the fix won't last - without counting the fact that the company cannot guarantee that they will send you back the special edition Joy Cons you wanted them to repair. So if buying new Joy Cons is not an option for you and you are looking for a lasting solution, then keep reading - we've got the right tutorial for you!
- What causes Joy Con drift
- Test it
- What you will need
- Fix it
- Credit
What causes Joy Con drift
The Nintendo Switch Joy Con can experience drifting, that is, a random movement of the analog stick is detected, even if this is not used. Some of the explanations of this issue include dust accumulation, worn-out contacts, or a wiring problem. It turns out that dust can be partially responsible for the drift but that's not all.
The main reason seems to be a design issue: with time, the contact point between the thumb stick sensor gets weaker. This results in a space between the metal prongs and the contact pads - and this is what creates the drift. Dust and dirt make things even worse.
Test it
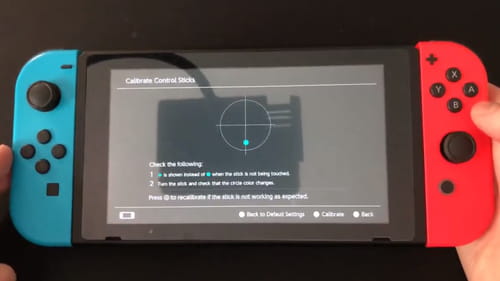
If you think that your Joy Con controller needs a fix, you might want to test it first, especially because modifying any Nintendo Switch accessory violates the warranty (3 months in the United States of America, 2 years in Europe). To do so, go to System Settings, then choose Controllers and Sensors. From there, tap Test Input Devices and then Test Controller Buttons. Now, press the control stick you want to test. Play around with it for a while and check if the central position of the analog stick stays in the middle or if it moves randomly (it drifts). Press and hold the stick to end the test.
What you will need
Before you jump in the Joy Con drift repair part, keep in mind that you will need a 1.5mm tri-wing screwdriver to open the Joy Con. This also works for Nintendo Switch Lite, although you cannot remove the Joy Cons from the console.
You will also need a piece of paper or a card with around 1mm of thickness and scissors.
Fix it
Here are the steps to follow:
-
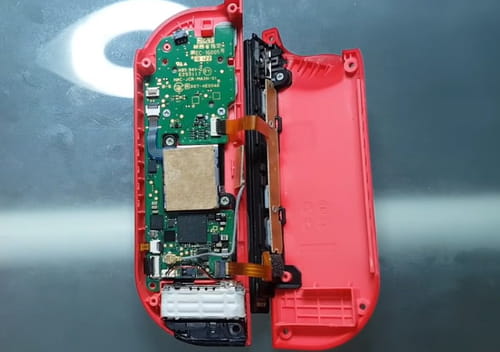
The first thing to do is to open your Joy Con with the screwdriver - you have four screws to remove in total.
-
Cut a rectangular piece from the paper or the card, the size of the analog stick mechanism, and put it on it.
-
Close the Joy Con.
And that's it! You fixed the space that was causing the drift - your Joy Con is good to go!
Credit
All credits for this solution go to VK's Channel on YouTube.
Images: Unsplash: @stereophototyp; Nintendo; VK's Channel
This document, titled « How to fix Joy Con drift », is available under the Creative Commons license. Any copy, reuse, or modification of the content should be sufficiently credited to CCM (ccm.net).
how to fix joy con drift
Source: https://ccm.net/faq/76498-how-to-fix-joy-con-drift
Posted by: gunndentoory1961.blogspot.com
0 Response to "how to fix joy con drift"
Post a Comment